Overview
This post focuses specifically on the production sound side — how I approached gear, workflow, and problem-solving on a small short-film shoot last weekend.
Over the past 5 years or so, I’ve been increasingly involved with sound for film. Both production sound mixing (on set) and in post production (editing, mixing). The films I get to work on are primarily shorts, shot in 1-5 days, and often as part of Encounters Films Collective. With each project, I always try to find ways to up my game in terms of process, workflow, equipment, and of course, results. With my most recent project last weekend, I thought it was a good time to start documenting this journey, initially focusing on production sound mixing.
Background
Coming into this project, I already had a decent kit for small shoots: a Sound Devices MixPre 10 II, Sennheiser MKH 50 and MKH 416 mics, four Sennheiser lav kits (mix of G4 and G3 with MKE 2 lavs), Orca OR 40 bag, and a couple of TentacleSync E timecode generators. This is a pretty standard small-kit setup for indie shorts — enough inputs for a boom and several wireless systems, a solid indoor/outdoor mic pair, and timecode for easy post workflows.
The shoot last weekend would require two lavs on day 1 (outdoor scene in a car), and 4 lavs on day 2 (interior). So I thought this was a good opportunity to try and improve a few things. First, I wanted a boom operator (at least for day 2) so I could fully focus on the four wireless kits and mixing. Second, my goal wasn’t to build a full professional, overly expensive cart, but a lightweight staging platform that could roll to set and keep my workflow organized, and my boom pole off the floor. And third, I wanted to get a program monitoring kit for the boom op, director, script supervisor, and first AD.
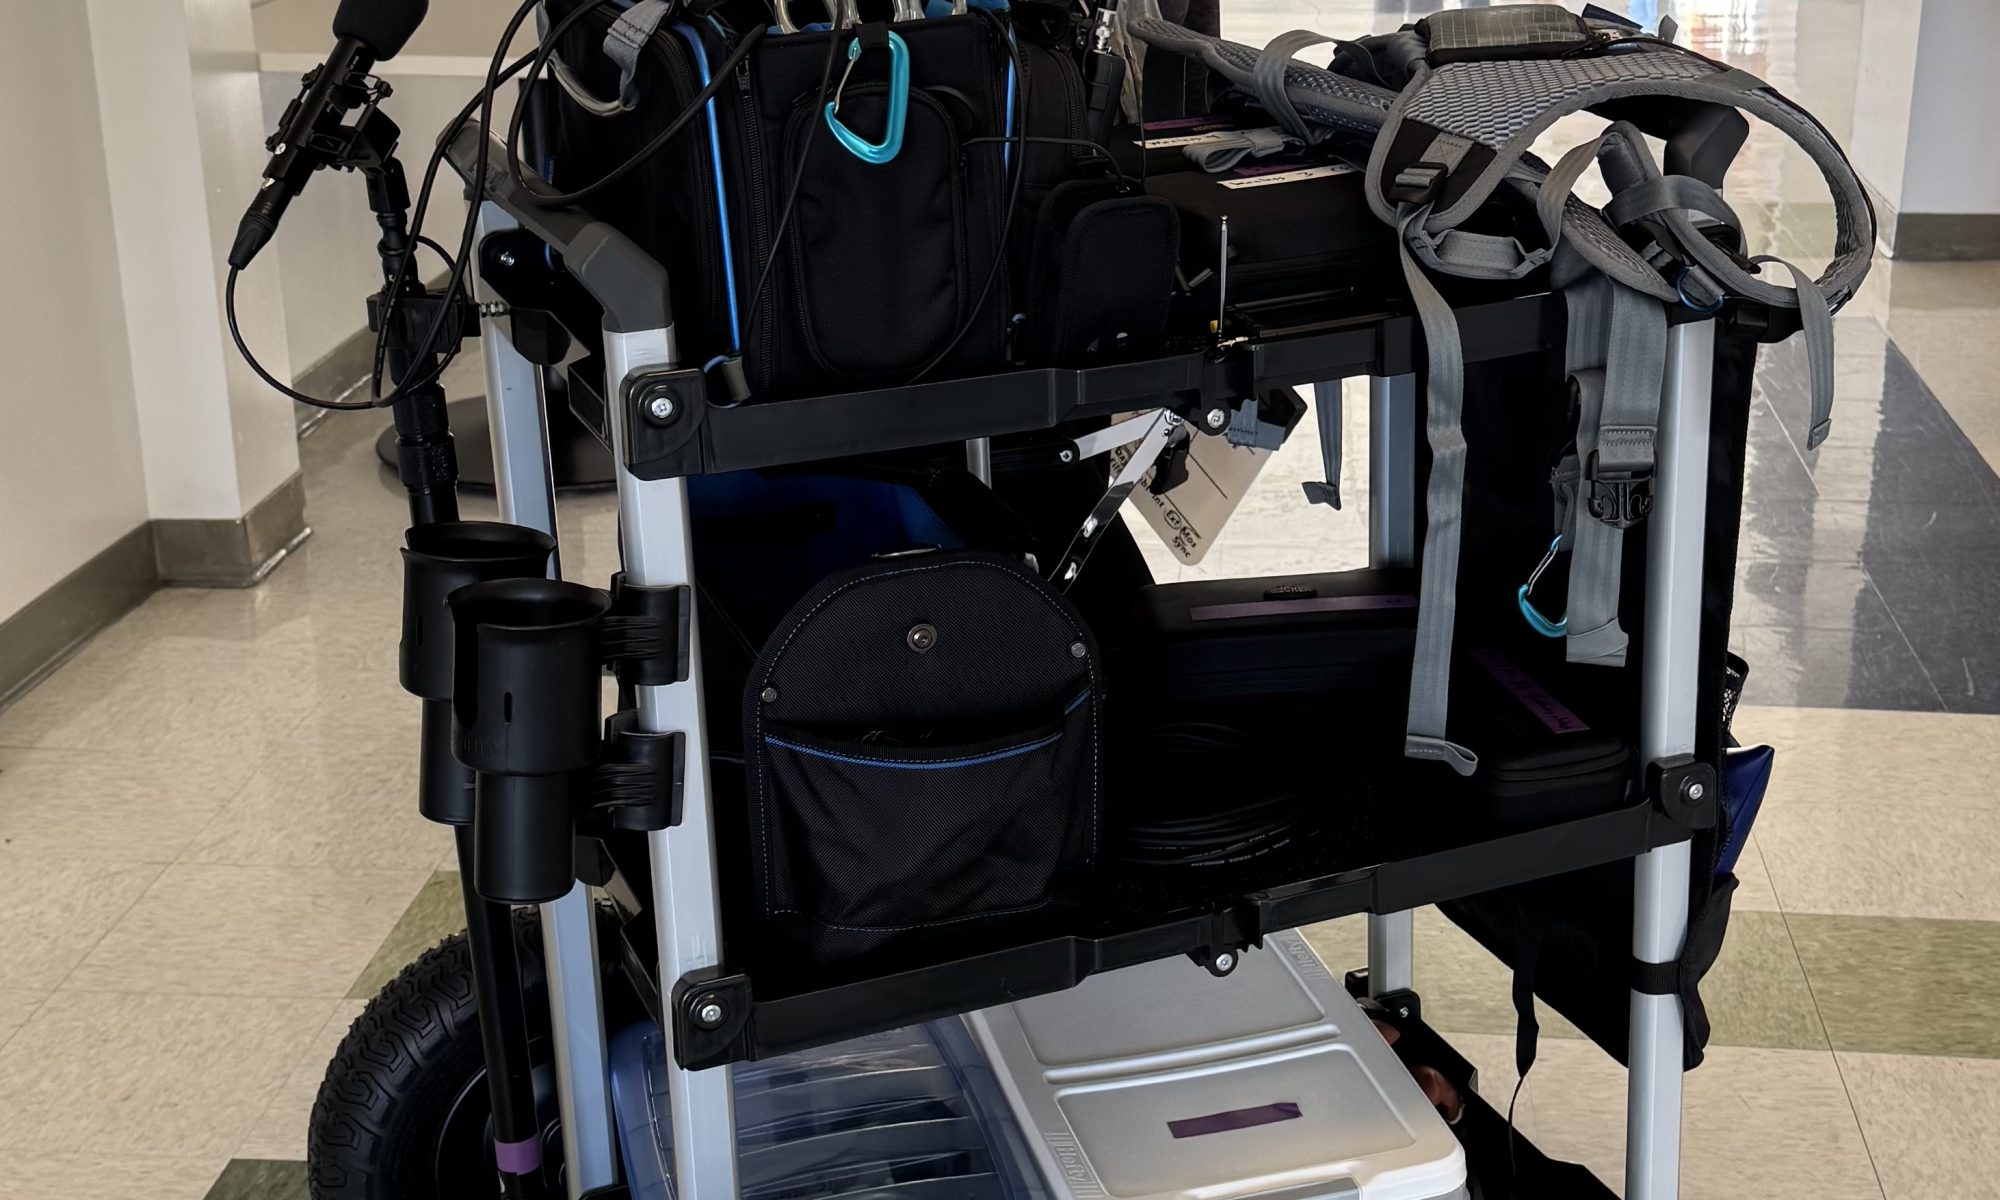
The Sound Cart
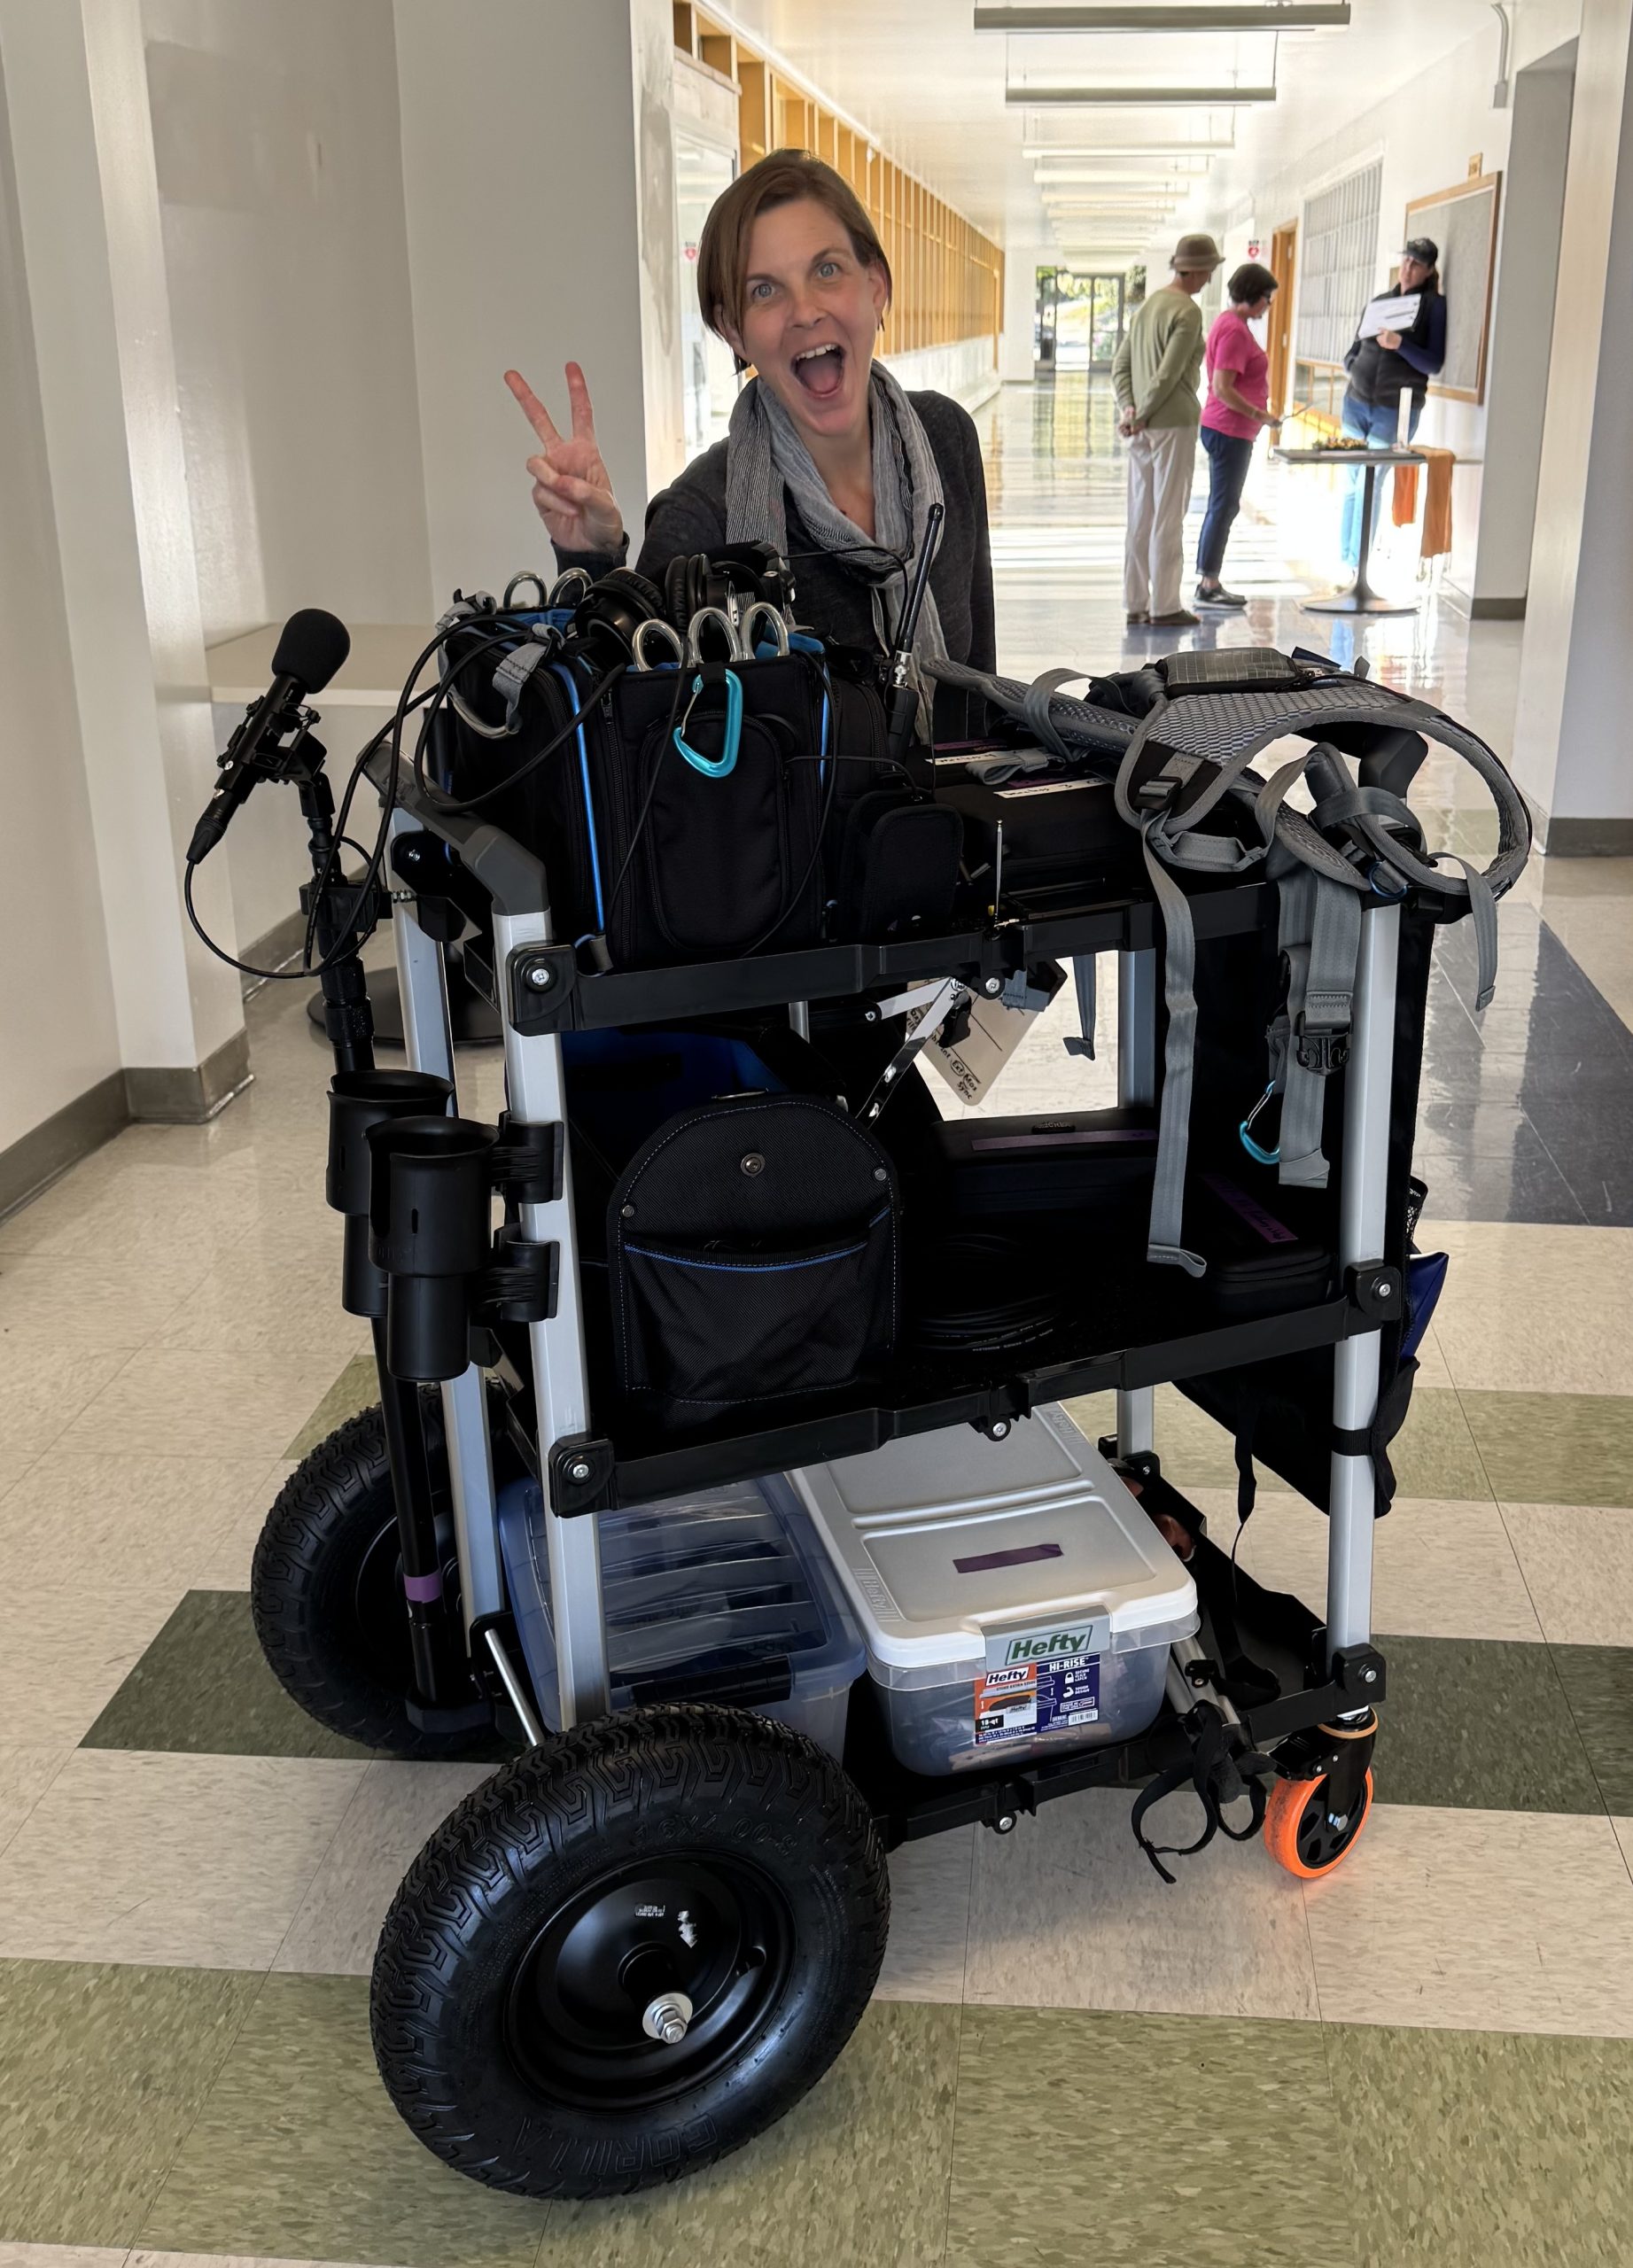
For the sound cart, I followed the Deity Blog’s version of this. It’s worth noting that prices have changed since they made this. They also don’t account for 3D printing costs, buying drill bits, or the fact that they had a $50 off deal when buying the Olympia XL Cart, etc. In reality, this cart cost me $736.67, plus the drink holder (another $30). But in general, I’m happy with it. It’s a bit rickety and creaky, but absolutely does the job I wanted it for. I was able to stage gear inside, and then roll the cart down to the morning shooting location for the car, and then back for the afternoon shoot.
Here are some quick learnings when building the cart:
- The front 5″ wheels from Amazon come in 4-packs. So split the cost with another mixer building the same cart if possible.
- The rear axle hubs protrude awkwardly — not a dealbreaker, but worth noting.
- Drilling holes for the axle was quite difficult, hence me having to get a different drill bit.
- The 3D printed inserts for the front wheels do not fit 100%. I had to use a drill bit to try and soften the edges of the hole the metal casing goes through. I’m not sure it’s completely through the second side, and may not have the support it needs over time.
- In Shapeways, when I chose the color “black” for the boom pole holder, it was a softer material than expected, and may not last as long (I’m new to 3D printing). I recommend sticking with a PVC pipe end cap for this.
But all in all, I do recommend this build!
The Program Monitoring Field Kit (Comteks)
If you’ve never used Comteks: they’re the industry-standard way to give directors and department leads a low-noise, always-on audio feed.
In the past, I had tried to provide this feature by sending audio through the camera and video sends (Accsoon CineEye 2 Pro), with headphone amps on the other side. This sometimes works, but after camera settings got changed after a setup once, I realized this was too fallible. I was on a couple of bigger sets (as a client) and got to hear the Comteks in action, so I decided to try those.
I went with the Comtek FPM-216 Field Program Monitoring Kit, which has a transmitter and two receivers. I picked up two additional receivers, and plan to use these to try out ShareGrid.
For my sends to camera (tethered) and for the Comteks, I used two different outputs. The Comteks were fed the boom audio (and sometimes lavs) from the recorder’s x1/x2 outputs, so I just had a stereo mini jack cable connecting them. I then also had the recorder’s L output channel sending boom only over to camera for production sound (which is mini-XLR on the recorder, to the XLR input on the camera (Canon C200 in this case).
This worked pretty well. Some questions I got were about noise in the room itself – HVAC we didn’t have control over, or the buzz of all the fluorescent lights in the room. And while the Comteks are not intended to be high fidelity (they are on lower frequencies, which is better for wireless distance, but not as good for sound), they work just fine for evaluating performance.
Frequency Management
Having a boom operator really allowed me to focus on getting frequencies dialed in for day 2. With four wireless kits to manage, I wanted to have the time to dial them in once early in the day and not fight interference later. Several things really helped with this:
- Having a reasonable load-in / set up up window (2 hours) was crucial for setup, dialing in frequencies, and getting four people lav’d up before starting.
- Having a boom operator on set doubled as having an assistant that could walk around to test selected frequencies.
- I recently picked up a TinySA Spectrum Analyzer, which has been really helpful in visualizing crowded areas. It helps identify low interference parts of the spectrum visually, so I can choose frequencies in those areas.
- I picked up the Frequency Finder app to avoid TV stations, prevent intermodulation issues, and keep track of all the frequencies in use.
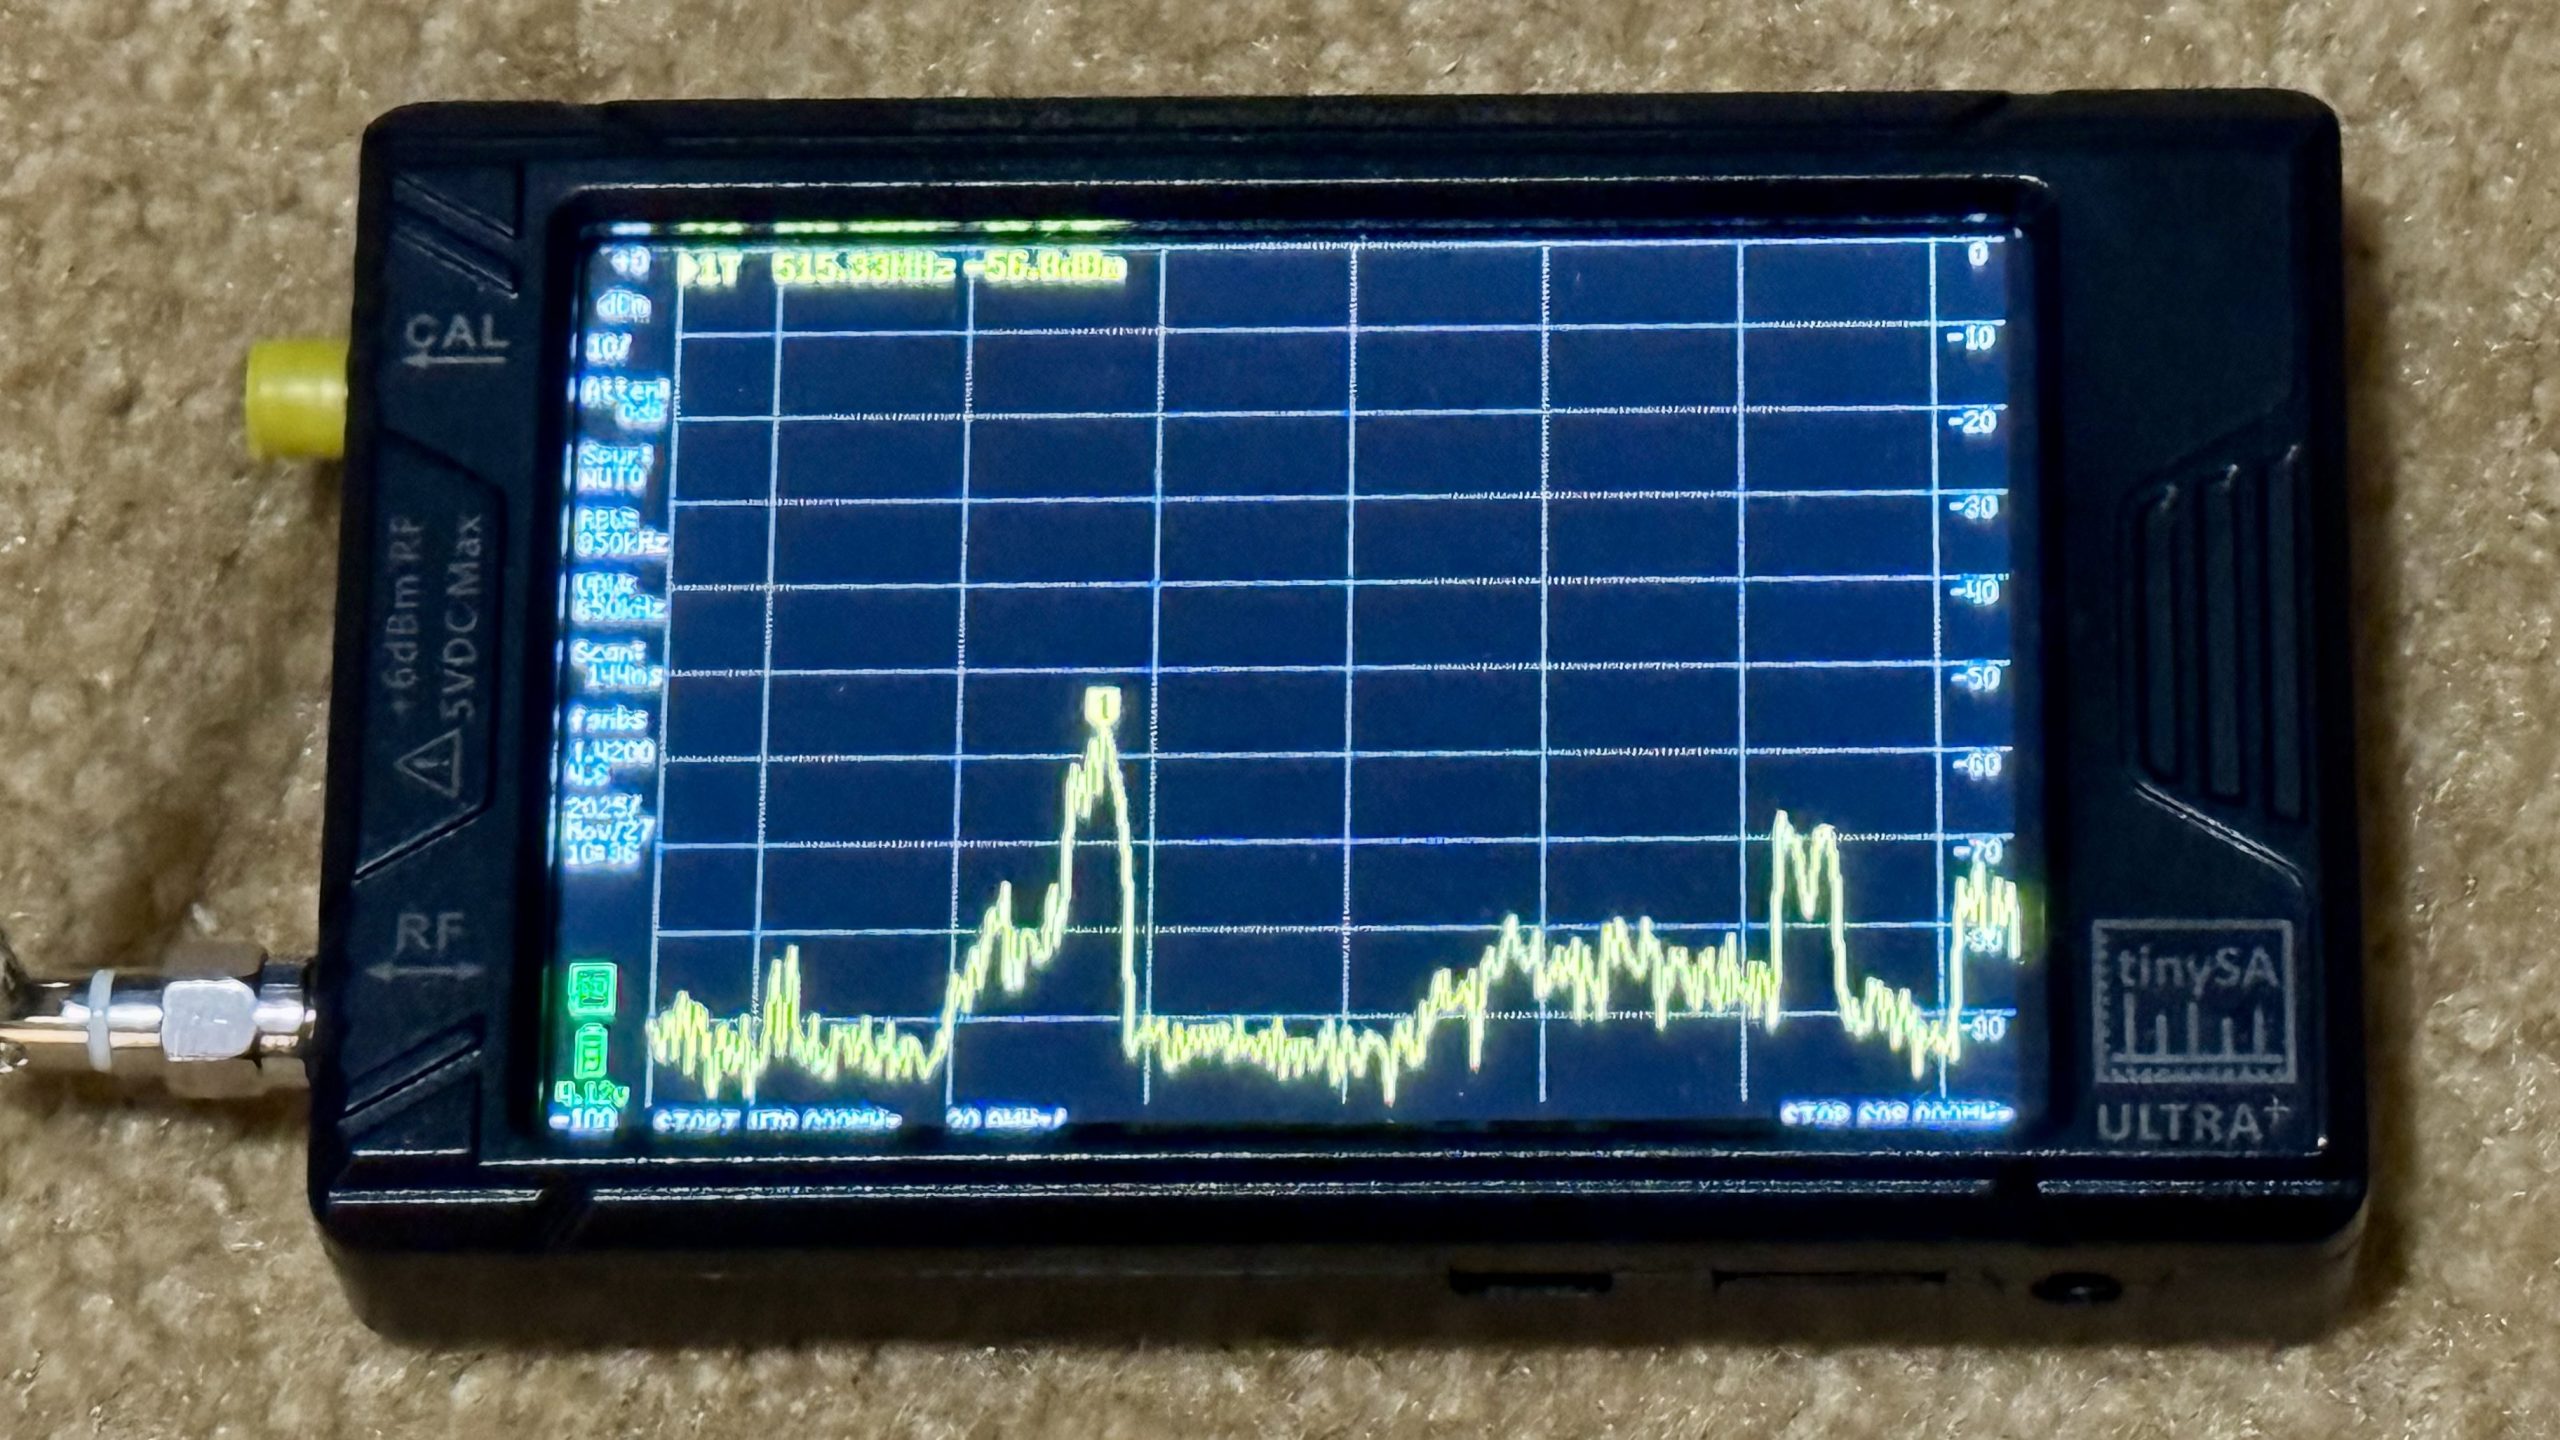
With all of this together, this shoot was the most successful from a frequency performance standpoint. I had zero RF hits all day — and that’s without any dedicated external antennas.
What’s Next?
I think the next area to focus on is really lav placement. Both in terms of location (avoiding seatbelts, or under too much clothing), as well as mounting in ways that better mitigate clothing rustle.
I’m currently investing in the URSA tools, and have been happy with those. So far I’ve been using the URSA waist straps, chest strap, circles (soft, plush, fur), and their tape as well. All have been good performers so far.
The fun (and challenge) of production sound is that every project exposes a new weak point to improve. Right now, that’s lav placement. Next month, who knows — maybe proper antennas, better bag organization, or eventually upgrading to Lectrosonics.
I’m excited to keep learning and documenting as I go!